-
×
 ARTITEQ S-Hook 20kg, pack of 20 2 × £10.20
 -
×
 ARTITEQ S-Hook 20kg, pack of 10 7 × £5.40
 -
×
 ARTITEQ Twister Hook 0.2kg, pack of 10 3 × £3.42
 -
×
 ARTITEQ Twister Hook 0.2kg, pack of 20 3 × £6.46
 -
×
 ARTITEQ Ratchet Hook 15kg 12 × £3.83
 -
×
 ARTITEQ Mini Hook 4kg 12 × £1.10
 -
×
 ARTITEQ Heavy Brass Hook 7kg 12 × £1.92
 -
×
 Picture Frame Foam Bumper, pack of 10 6 × £1.00
 -
×
 ARTITEQ S-Hook 20kg 4 × £0.60
 -
×
 ARTITEQ Auto Grip LOCK Hook 15kg 7 × £5.00
 -
×
 ARTITEQ Loop Maker Wire Clamp 2mm, pack of 5 1 × £4.83
 -
×
 Wire Sleeve Clamp 2mm, pack of 100 1 × £4.00
 -
×
 D-Ring Hanger brass single hole, pack of 25 4 × £3.00
 -
×
 D-Ring Hanger nickel single hole, pack of 25 4 × £3.00
 -
×
 D-Ring Hanger brass double hole, Pack of 25 4 × £3.60
 -
×
 D-Ring Hanger nickel double hole, pack of 25 4 × £3.60
 -
×
 Adhesive Hanger 1kg 4 × £2.08
 -
×
 Adhesive Hanger 2kg 4 × £3.08
 -
×
 Adhesive Hanger 4kg 4 × £5.79
 -
×
 Adhesive Hanger 8kg 4 × £8.71
 -
×
 ARTITEQ Steel Hanger for wooden frame 6 × £1.08
 -
×
 ARTITEQ Steel Hanger for wooden frame, pack of 5 4 × £5.13
 -
×
 ARTITEQ Steel Hanger for wooden frame, pack of 10 4 × £9.72
 -
×
 ARTITEQ Steel Hanger for aluminium frame 6 × £1.75
 -
×
 ARTITEQ Steel Hanger for aluminium frame, pack of 5 4 × £8.31
 -
×
 ARTITEQ Steel Hanger for aluminium frame, pack of 10 4 × £15.75
 -
×
 ARTITEQ Corner Frame Hanger 2 × £3.71
 -
×
 ARTITEQ Corner Frame Hanger, pack of 5 2 × £17.62
 -
×
 ARTITEQ Corner Frame Hanger, pack of 10 5 × £33.39
 -
×
 ARTITEQ Side Frame Hanger 1mm 4 × £4.58
 -
×
 ARTITEQ Side Frame Hanger 2mm 6 × £4.83
 -
×
 ARTITEQ Side Frame Hanger 2mm, pack of 10 5 × £43.47
 -
×
 Sawtooth Hanger brass 45mm 25pcs 2 × £2.50
 -
×
 Sawtooth Hanger nickel 45mm 25pcs 2 × £2.50
 -
×
 SPRINGLOCK Security Lock Bridge Bracket, pack of 10 6 × £8.00
 -
×
 SPRINGLOCK Security Lock Bridge Bracket, pack of 50 7 × £34.00
 -
×
 SPRINGLOCK Security Lock Bridge Bracket, pack of 100 5 × £56.00
 -
×
 SPRINGLOCK Security Lock Top Bracket, pack of 10 5 × £4.00
 -
×
 SPRINGLOCK Security Lock Top Bracket, pack of 50 6 × £17.00
 -
×
 SPRINGLOCK Security Lock Top Bracket, pack of 100 7 × £28.00
 -
×
 SPRINGLOCK Security Lock Marker and Release Tool 6 × £4.20
 -
×
 ARTITEQ Up Rail Installation Bracket, pack of 10 2 × £3.00
 -
×
 ARTITEQ Up Rail Gallery Hanging Set 200cm 1 × £32.40
 -
×
 ARTITEQ Twister Hook 0.2kg, pack of 5 1 × £1.90
 -
×
 ARTITEQ Sliding Spring 3mm 20kg 1 × £1.08
 -
×
 ARTITEQ Heavy Hook 7kg 3 × £1.92
 -
×
 ARTITEQ Alu Hook 10kg 6 × £1.25
 -
×
 ARTITEQ Mini Hook 4kg, pack of 20 1 × £18.70
 -
×
 ARTITEQ Round Brass Hook 5kg, pack of 20 2 × £25.50
 -
×
 ARTITEQ Round Brass Hook 5kg, pack of 10 2 × £13.50
 -
×
 ARTITEQ Round Brass Hook 5kg 6 × £1.50
 -
×
 ARTITEQ Heavy Hook 7kg, pack of 20 1 × £30.72
 -
×
 ARTITEQ Alu Hook 10kg, pack of 10 1 × £11.25
 -
×
 ARTITEQ Micro Grip Hook 20kg 9 × £3.83
 -
×
 ARTITEQ Sloping Wall Stopper 2 × £0.80
 -
×
 ARTITEQ Clip Hook 2kg 2 × £0.92
 -
×
 ARTITEQ Mini Hook 4kg, pack of 10 1 × £9.90
 -
×
 ARTITEQ Alu Hook 10kg, pack of 20 2 × £21.25
 -
×
 ARTITEQ Micro Grip LOCK Hook 20kg, pack of 5 4 × £22.94
 -
×
 ARTITEQ Micro Grip LOCK Hook 20kg 7 × £4.83
 -
×
 ARTITEQ Auto Grip LOCK Hook 15kg, pack of 10 2 × £42.50
 -
×
 Security Wire Stopper 2 × £3.32
 -
×
 ARTITEQ Micro Grip LOCK Hook 20kg, pack of 10 1 × £41.06
 -
×
 ARTITEQ Micro Grip Hook 20kg, pack of 5 1 × £18.19
 -
×
 ARTITEQ Sloping Wall Stopper, pack of 5 2 × £3.60
 -
×
 ARTITEQ Ratchet Hook 15kg, pack of 5 2 × £18.19
 -
×
 ARTITEQ Clip Hook 2kg, pack of 10 1 × £8.28
 -
×
 ARTITEQ Up Rail Art Hanging Set 200cm 1 × £27.00
You may be interested in…
-
Add
This product has multiple variants. The options may be chosen on the product page
 ARTITEQ U-Top Studio Hanging Rod 2mm white 20kg
£1.42 – £2.08
Subtotal: £2,567.73


 ARTITEQ S-Hook 20kg, pack of 20
  ARTITEQ Twister Hook 0.2kg, pack of 10
  ARTITEQ Ratchet Hook 15kg
  ARTITEQ Mini Hook 4kg
 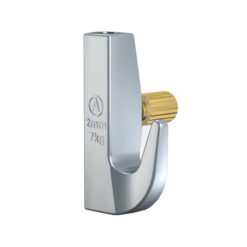 ARTITEQ Heavy Brass Hook 7kg
 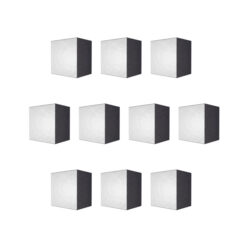 Picture Frame Foam Bumper, pack of 10
  ARTITEQ Auto Grip LOCK Hook 15kg
  ARTITEQ Loop Maker Wire Clamp 2mm, pack of 5
  Wire Sleeve Clamp 2mm, pack of 100
  D-Ring Hanger brass single hole, pack of 25
  D-Ring Hanger nickel single hole, pack of 25
  D-Ring Hanger brass double hole, Pack of 25
 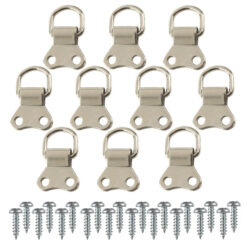 D-Ring Hanger nickel double hole, pack of 25
  Adhesive Hanger 1kg
  ARTITEQ Steel Hanger for wooden frame
  ARTITEQ Steel Hanger for aluminium frame
  ARTITEQ Corner Frame Hanger
  ARTITEQ Side Frame Hanger 1mm
  ARTITEQ Side Frame Hanger 2mm
 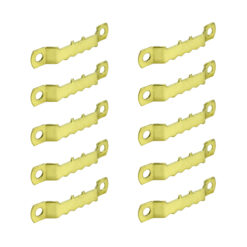 Sawtooth Hanger brass 45mm 25pcs
  Sawtooth Hanger nickel 45mm 25pcs
  SPRINGLOCK Security Lock Bridge Bracket, pack of 10
  SPRINGLOCK Security Lock Top Bracket, pack of 10
  SPRINGLOCK Security Lock Marker and Release Tool
  ARTITEQ Up Rail Installation Bracket, pack of 10
  ARTITEQ Up Rail Gallery Hanging Set 200cm
 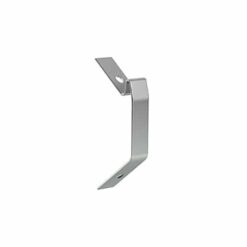 ARTITEQ Sliding Spring 3mm 20kg
  ARTITEQ Heavy Hook 7kg
  ARTITEQ Alu Hook 10kg
  ARTITEQ Round Brass Hook 5kg, pack of 20
  ARTITEQ Micro Grip Hook 20kg
  ARTITEQ Sloping Wall Stopper
  ARTITEQ Clip Hook 2kg
  ARTITEQ Micro Grip LOCK Hook 20kg, pack of 5
  Security Wire Stopper
  ARTITEQ Up Rail Art Hanging Set 200cm
